Google Plus Blogger Template

#
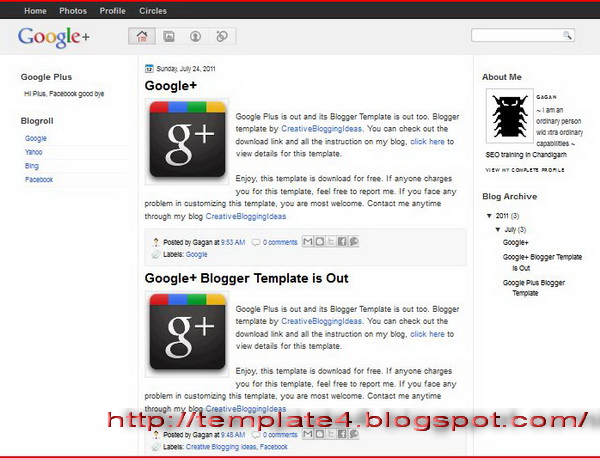
Google Plus


Name:Google Plus
Platform:Blogger / Blogspot
Coder/Designer:Creative Blogging Ideas
Coder/Designer URL:http://www.creativebloggingideas.com/
Description:Google Plus is a free Blogger template that is a minimalist design, with
2 Sidebar, 3 Column, white color background, Fixed width, Left Sidebar and Right Sidebar and more.
Theme Features:-
Instructions:1. Change the logo:
open template source code and search for:

https://blogger.googleusercontent.com/img/b/R29vZ2xl/AVvXsEhJuiDwp_LrAGUkphpEWsnFl03GV3Popl0ZMPvuJC8n3EZOxIGvfNGawv5GwbV57veJqwkR2zusYIk16JcMEj28l6BUq9PwLPBLW4tnknSnpqWW6suSsxvQm23cFHTMS5WE3vVLH0szlwo/s320/google-logo-plus-0fbe8f0119f4a902429a5991af5db563.png
replace this image link with you own logo but remember the size should be same.

2. There are four menu option but beside the logo, by default I’ve given some links, if you want to change it, you have to do it manually. Search for <div class=’top-options’> and you can make the changes there.

3. At top there is option to add Pages that are added automatically.
Compatible:Mozilla FirefoxGoogle ChromeSafariOperaInternet Explorer
Tags:2 sidebar, 3 column, Blogger, Fixed Width, Left Sidebar, Magazine, Right Sidebar, White

NJ Company Blogger Template

#
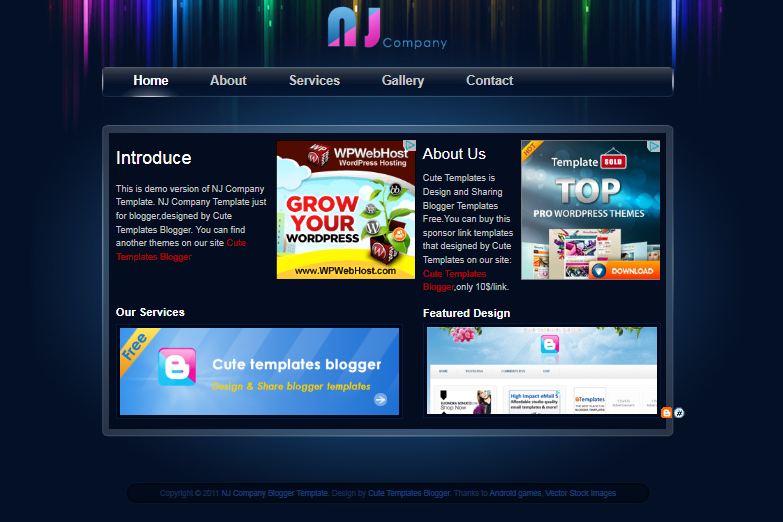
Name:NJ Company
Platform:Blogger / Blogspot
Description:NJ Company Blogger Template is a clean and nice elegant style blogger template adapted from WordPress Theme to Blogger Template. It's a 1 column blogger template, cool elegant look background.top navigation bar and this blogger template suitable for company introduce blogs.
Template Author:Cute Templates Blogger
Designer URLhttp://cutetemplatesblogger.blogspot.com
Instructions:-
Compatible:Mozilla FirefoxGoogle ChromeSafariOperaInternet Explorer
Tags:1 Column, Adapted from Wordpress, Ads Ready, adsense ready, Blogger, Blue, Business, dark, Elegant

Bionic Blogger Template

#
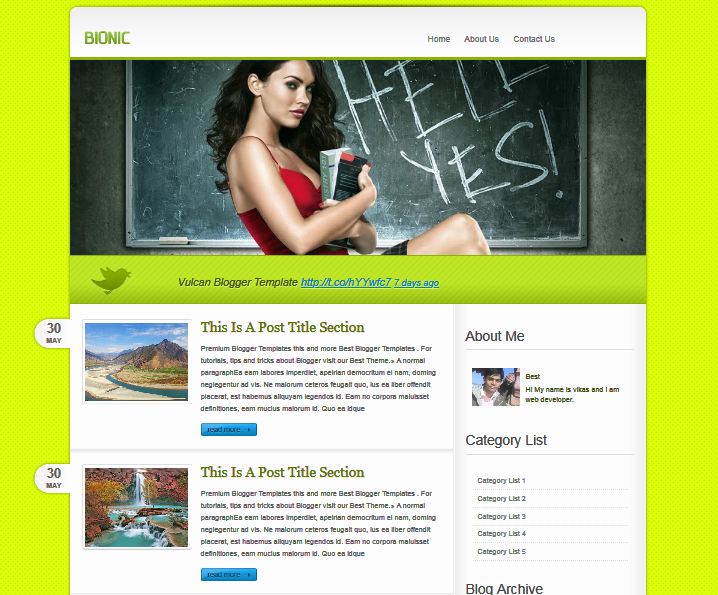
Name:Bionic
Platform:Blogger / Blogspot
Description:Bionic Blogger Template is another beautiful HTML5 and CSS3 latest blogger coding and disqus comment system. Bionic Blogger Template which is modified and converted from WordPress theme. This template have a very vivid color scheme, slider and twitter integration. This template contains three version: Bionic Blogger Template Full Version, Bionic Blogger Template Simple Version and Bionic Blogger Template Without Slider Version
Template Author:Avinas Bhardwaj
Designer URLhttp://top-wordpress.net/
Instructions:Setting for discus comment system:
First sign up at http://disqus.com/. And create a site profile at there and then find disqus_shortname in your html template in extended form. And your short name next to this.
Compatible:Mozilla FirefoxGoogle ChromeSafariOperaInternet Explorer
Tags:1 Sidebar, 2 Column, 4 Column Footer, Adapted from Wordpress, Blogger, CSS3, Green, HTML5, Magazine, Right Sidebar, Slider, Threaded Comments, Twitter Ready, White, Yellow

DotNews Blogger Template

#


Features:
Instructions: How to use this template
Template author:PBTemplates
Designer:
Description:DotNews is a free blogger template adapted from WordPress with 3 columns, sidebar on the right and left, magazine-styled, space for ads, slideshow, posts thumbnails, tabs and drop down menu.

Luxury Yatching Blogger Template

#


Features:

Instructions:How to use this template
Author:PBTemplates
Designer:
Description:Luxury Yatching is a free premium blogger template adapted from WordPress with 2 columns, right sidebar, magazine-styled, footer columns, slideshow and posts thumbnails.

Techa WordPress Theme

#


Techa is a 3 columns fixed width WordPress theme by MagPress.com. This Dark Blue WordPress template comes with customized homepage layout, custom first/latest post display, custom recent posts block, featured categories, Adsense ready and many more.

Solarmag WordPress Theme

#


Solarmag is a 2 columns fixed width WordPress theme by MagPress.com. This WP theme comes with theme options, featured posts, Adsense ready, sidebar tabbers, footer widgets and many more.

Pinkvisor WordPress Theme

#


Pinkvisor is 2 columns fixed width WordPress theme by MagPress.com. This Pink WordPress template has theme options, featured content slider, featured categories, Adsense ready, Twitter and many more.

Minimal Swiss Design Blogger Template

#


The Minimal Swiss Design theme by Marios Lublinski (released by Smashing Magazine) is just one of those templates. Ideally suited to artists and designers, this simple and beautiful template instantly inspired me to create a Blogger conversion (including additional theme options for customizing the design).

This blogger template for free under the GPLv2 License, which means you can use them for all your projects for free and without any restrictions.

Features of this template

Minimal Swiss Design is a simple CSS-based template which uses no external JavaScript and loads swiftly in the browser.

It features a three column layout with two narrow sidebars which are ideally suited to Picture gadgets for display of visual portfolio items and is wholly compatible with the Blogger template designer for customization of backgrounds, colours and fonts.

More features include:
  • Widget sections in the header for address details and social media links
  • Use of custom fonts from the Google Font Directory
  • Choose to display post titles only on item pages (perfect for a portfolio site) or site-wide
  • Upload your own background image using the Blogger template editor
  • Change all background colours, fonts and font colours to create a visual theme of your own
I've checked the design in a wide variety of browsers and am assured of it's compatibility right back to Internet Explorer 6!

How to install this template

This Minimal Swiss Design template works right out of the box and can be installed in just a few mouse clicks!

First you'll need to download the version you would like to use:
Once you've downloaded the appropriate file, extract the template to a location on your computer.

Now log into your Blogger dashboard and go to Design>Edit HTML. Near the top of this page you'll see a section where you can choose to "Upload a new template". Click this button which will prompt you to locate the XML file for your template.

Select your extracted template file and click "Upload".

Note: You may receive a notice that gadgets in your existing template are not present in the new design. If you would like to keep these widgets, select "Keep widgets" from the options available (alternatively you can choose to delete these widgets).

Once the upload is complete, choose to "View blog" to see the new template in action.

Add your gadgets to the sidebar

This template was designed primarily to be used as a portfolio site and is very suited to image gadgets in the sidebars.

Go to Design>Page Elements to add gadgets to your layout. When you add Picture gadgets through this page, the images you upload will be automatically resized to fit the sidebar's width.

Note: Gadget titles in the sidebar will appear if present (using the "Syncopate" font used for the blog title). If you do not want to display gadget titles, do not add a title for your gadget.

Customize the design

This template is fully compatible with the Blogger template designer, enabling us to customize the appearance using the WYSIWYG editor with live previews. You can even remove the background image and replace it with an image of your own!

To customize the Minimal Swiss Design template, simply go to Design>Template Designer in your Blogger dashboard and select your chosen options from the menu in the left column:

Customize the background image
Customize fonts and colours

Credits and usage guidelines

This template was converted from the original Wordpress design by Marios Lublinski, which is distributed by Smashing Magazine.

It is available for use under the GPLv2 License which enables free use for all your personal and commercial projects without the requirement of attribution. In other words, you don't have to link back to Blogger Buster or Marios Lublinski (though of course we wouldn't complain if you do!).

If you'd like to spread the word about this free template, please link to this article rather than the actual download link so others may find complete instructions for installation, customization and credits.

Display Post Summaries and Automatic Thumbnails

#


With only a few small changes to our Blogger template, we can display post summaries and thumbnails using this easy to manage hack.


How to add Blogger post summaries and thumbnails in three simple steps

Here's my step-by-step guide to the easiest solution for post summaries and thumbnails with Blogger:

Step 1 - Back up your template!

It is important to back up your Blogger template before making any edits. This ensures we can easily restore the working template if anything goes wrong.

You'll be prompted to save an XML file to your computer hard drive - this XML file includes all of the HTML and widget templates required to display your current Blogger design. Be sure to save this in an easy to remember location and make a note of the file name in case you later need to restore your working template.

Step 2 - Add the code to display summaries and thumbnails on non-item pages


The next stage is to add the Blogger code which will display a summary and thumbnail of our posts. Go to Design>Edit HTML and check the Expand widget templates box and search for the following line of code:

<data:post.body />

Replace this line with the following code:

      <b:if cond='data:blog.pageType != "item"'>
          <b:if cond='data:post.snippet'>
          <b:if cond='data:post.thumbnailUrl'>
              <div class='Image thumb'>
                <img expr:src='data:post.thumbnailUrl'/>
              </div>
          </b:if>
            <data:post.snippet/>
    <b:if cond='data:post.jumpLink != data:post.hasJumpLink'>
      <div class='jump-link'>
        <a expr:href='data:post.url + "#more"' expr:title='data:post.title'><data:post.jumpText/></a>
      </div>
    </b:if>
          <b:else/>
            <data:post.body/>
          </b:if>
      <b:else/>
      <data:post.body/>
      </b:if>

Preview the change to your template and you'll see that your posts will appear in a format similar to this:


As seen in the screenshot above, the thumbnail appears above the summary. We can align the thumbnail more cohesively to the left or right of the summary by adding CSS to our template.

At this stage, you can choose to save the edit to your template or add the CSS and preview the final effect before committing the changes to your site.

Step 3 - Add CSS to align the thumbnail image

While still on the Design>Edit HTML section of your dashboard, search for the following line:

</b:skin>

Immediately before this line, paste the following CSS statement:

.thumb img {
  float: left;
  margin: 0 10px 10px 0;
}

This will align the thumbnail to the left of the post summary, and allow some distance between the thumbnail and text like this:


If you would prefer to align your thumbnail image to the right, paste the following code instead:

.thumb img {
  float: right;
  margin: 0 0 10px 10px;
}

Preview your template to see how this makes your posts appear on the home page. When you're happy with the layout, save your template and enjoy your automated thumbnails!

How this customization displays summaries and thumbnails

While simple to add to our Blogger template in order for the function to work, there is a lot of complex conditional code in use to ensure the summaries display as they should.

First, the code checks if the page being viewed is an item page or not. If the page is not an item page, the summary/thumbnail code will come into effect.

The second check discovers if a post snippet is available (i.e: if the post contains some text). If there is a snippet, the code checks if a thumbnail is available and displays the thumbnail if there is, followed by the snippet. Where no thumbnail is available (when the post does not contain an image), only the snippet is displayed.

If there is no snippet available for a particular post, the complete body of text is displayed normally. This ensures that posts with no content or which feature only an image are displayed normally; no thumbnail is displayed, and any images are displayed at full size.

Finally, the code checks if the post contains the <!-- more --> tag. If it does not contain this tag, a "Read more" link will be displayed beneath the snippet, ensuring visitors can easily click through to read the post page. Where a jump-link is present, this is displayed as normal after the snippet.

Twitter Inspired Blogger Template – Twit Plus

#


This blogger template is called as Twit plus and has all the Twitter style features. This template is totally unique and different.

Template Specifications:
  • Two column Twitter style layout.
  • Twitter-like floating header
  • Twitter-like expandable post contents
  • Read more and comments link shown when hovered
  • Twitter-like Profile box on home page
  • Widgets ready
  • Social share icons for blog post

Template Settings

1. Blog Title


<div class='logo'><a expr:href='data:blog.homepageUrl'><h2>Twit Plus</h2></a></div>

2. Navigation Bar


<div id='nav'>
 <ul>
 <li><a expr:href='data:blog.homepageUrl'>Home</a></li>
 <li><a href='#'>About</a></li>
 <li><a href='#'>Contact</a></li>
 </ul>
</div>

3. Profile Box


Profile image size : 128px X 128px

<div class='authorimg'>
     <img src='http://3.bp.blogspot.com/_b8IA1ajBJG8/TTLRUxcD4oI/AAAAAAAAB4g
/vqBMUVneVII/s1600/default_pic.png'/>
</div>
<div class='authorinfo'>
     <span class='name'><h3>Bloggermint</h3></span>
     <span class='location'><h4>Mountain View, California</h4></span>
     <span class='bio'>Bloggermint focus on blogger, wordpress, web tips, web design to help bloggers blog better.</span>
</div>

4. Profile link and follow button


<div class='profilelink'>
    <a href='#'>View My Profile!</a>
    <span class='follow button'><img src='https://blogger.googleusercontent.com/img/b/R29vZ2xl/AVvXsEjdDY04SXNxg9E2gsbJSxSsCC1IvaTxt3HPmFQ01ko4VDWnnlZDzXHb6XQuXmfwRwaKn8PmUbMAh5YnFJpg7QnOU9R3W4q7vxDPozA6IYY4MDi6Rmv6GmM8ry4qH3T0AYVWMWQH8aQF9U4V/s1600/add.png' style='left: -3px;position: relative;top: 1px;'/><a href='http://twitter.com/username'>Follow</a></span>
</div>

5. Mini Profile Pic in Post Area


Mini image size : 48px X 48px

<!-- Post Author Image Start -->
<div class='authorpic'>
<img src='http://3.bp.blogspot.com/_b8IA1ajBJG8/TTLSDkWo33I/AAAAAAAAB4o
/D5ioqogJ250/s1600/default_profile_normal.png'/>
</div>
<!-- Post Author Image End -->

6. Followers, fans, subscribers count


<div id='follow'>
<div class='twitter'><a href='http://twitter.com/username'><b>299</b></a><span class='bot'>Followers</span></div>
<div class='facebook'><a href='http://www.facebook.com/pages'><b>299</b></a><span class='bot'>Fans</span></div>
<div class='feedburner'><a href='http://feedburner.google.com/feed'><b>299</b></a><span class='bot'>Subscribers</span></div>
</div>

Get the feel of Twitter for you blog now!